Secure Your Server Part 1: Setting Up WireGuard
Firewall
I am using Hetzner. The same basic setup will apply to any firewall.
Quick tip: If you have manually changed any setting on your OS-level firewall, make sure its configuration will not block new rules created for WireGuard.
First, navigate to your VPS firewall configuration. For Hetzner, that is in the left-hand menu in the projects console at https://console.hetzner.com/projects.
You will want to add one inbound rule. Set the source to whatever IPs you want to allow. You can set it to Any IPv4 or just your home, office, or other public IP. This will be the IP range that is allowed to send inbound traffic on this rule's port and protocol.
Next, set the protocol to UDP.
Then, set the port to 51820. This is not a required port number, but it is the standard port number used by WireGuard. Changing this port number does not guarantee that no one will try to send requests to your WireGuard instance, but it can reduce random scanning attempts.
After this, save and associate that firewall with the server where you will install WireGuard.
Here is what my Hetzner firewall setup looks like:
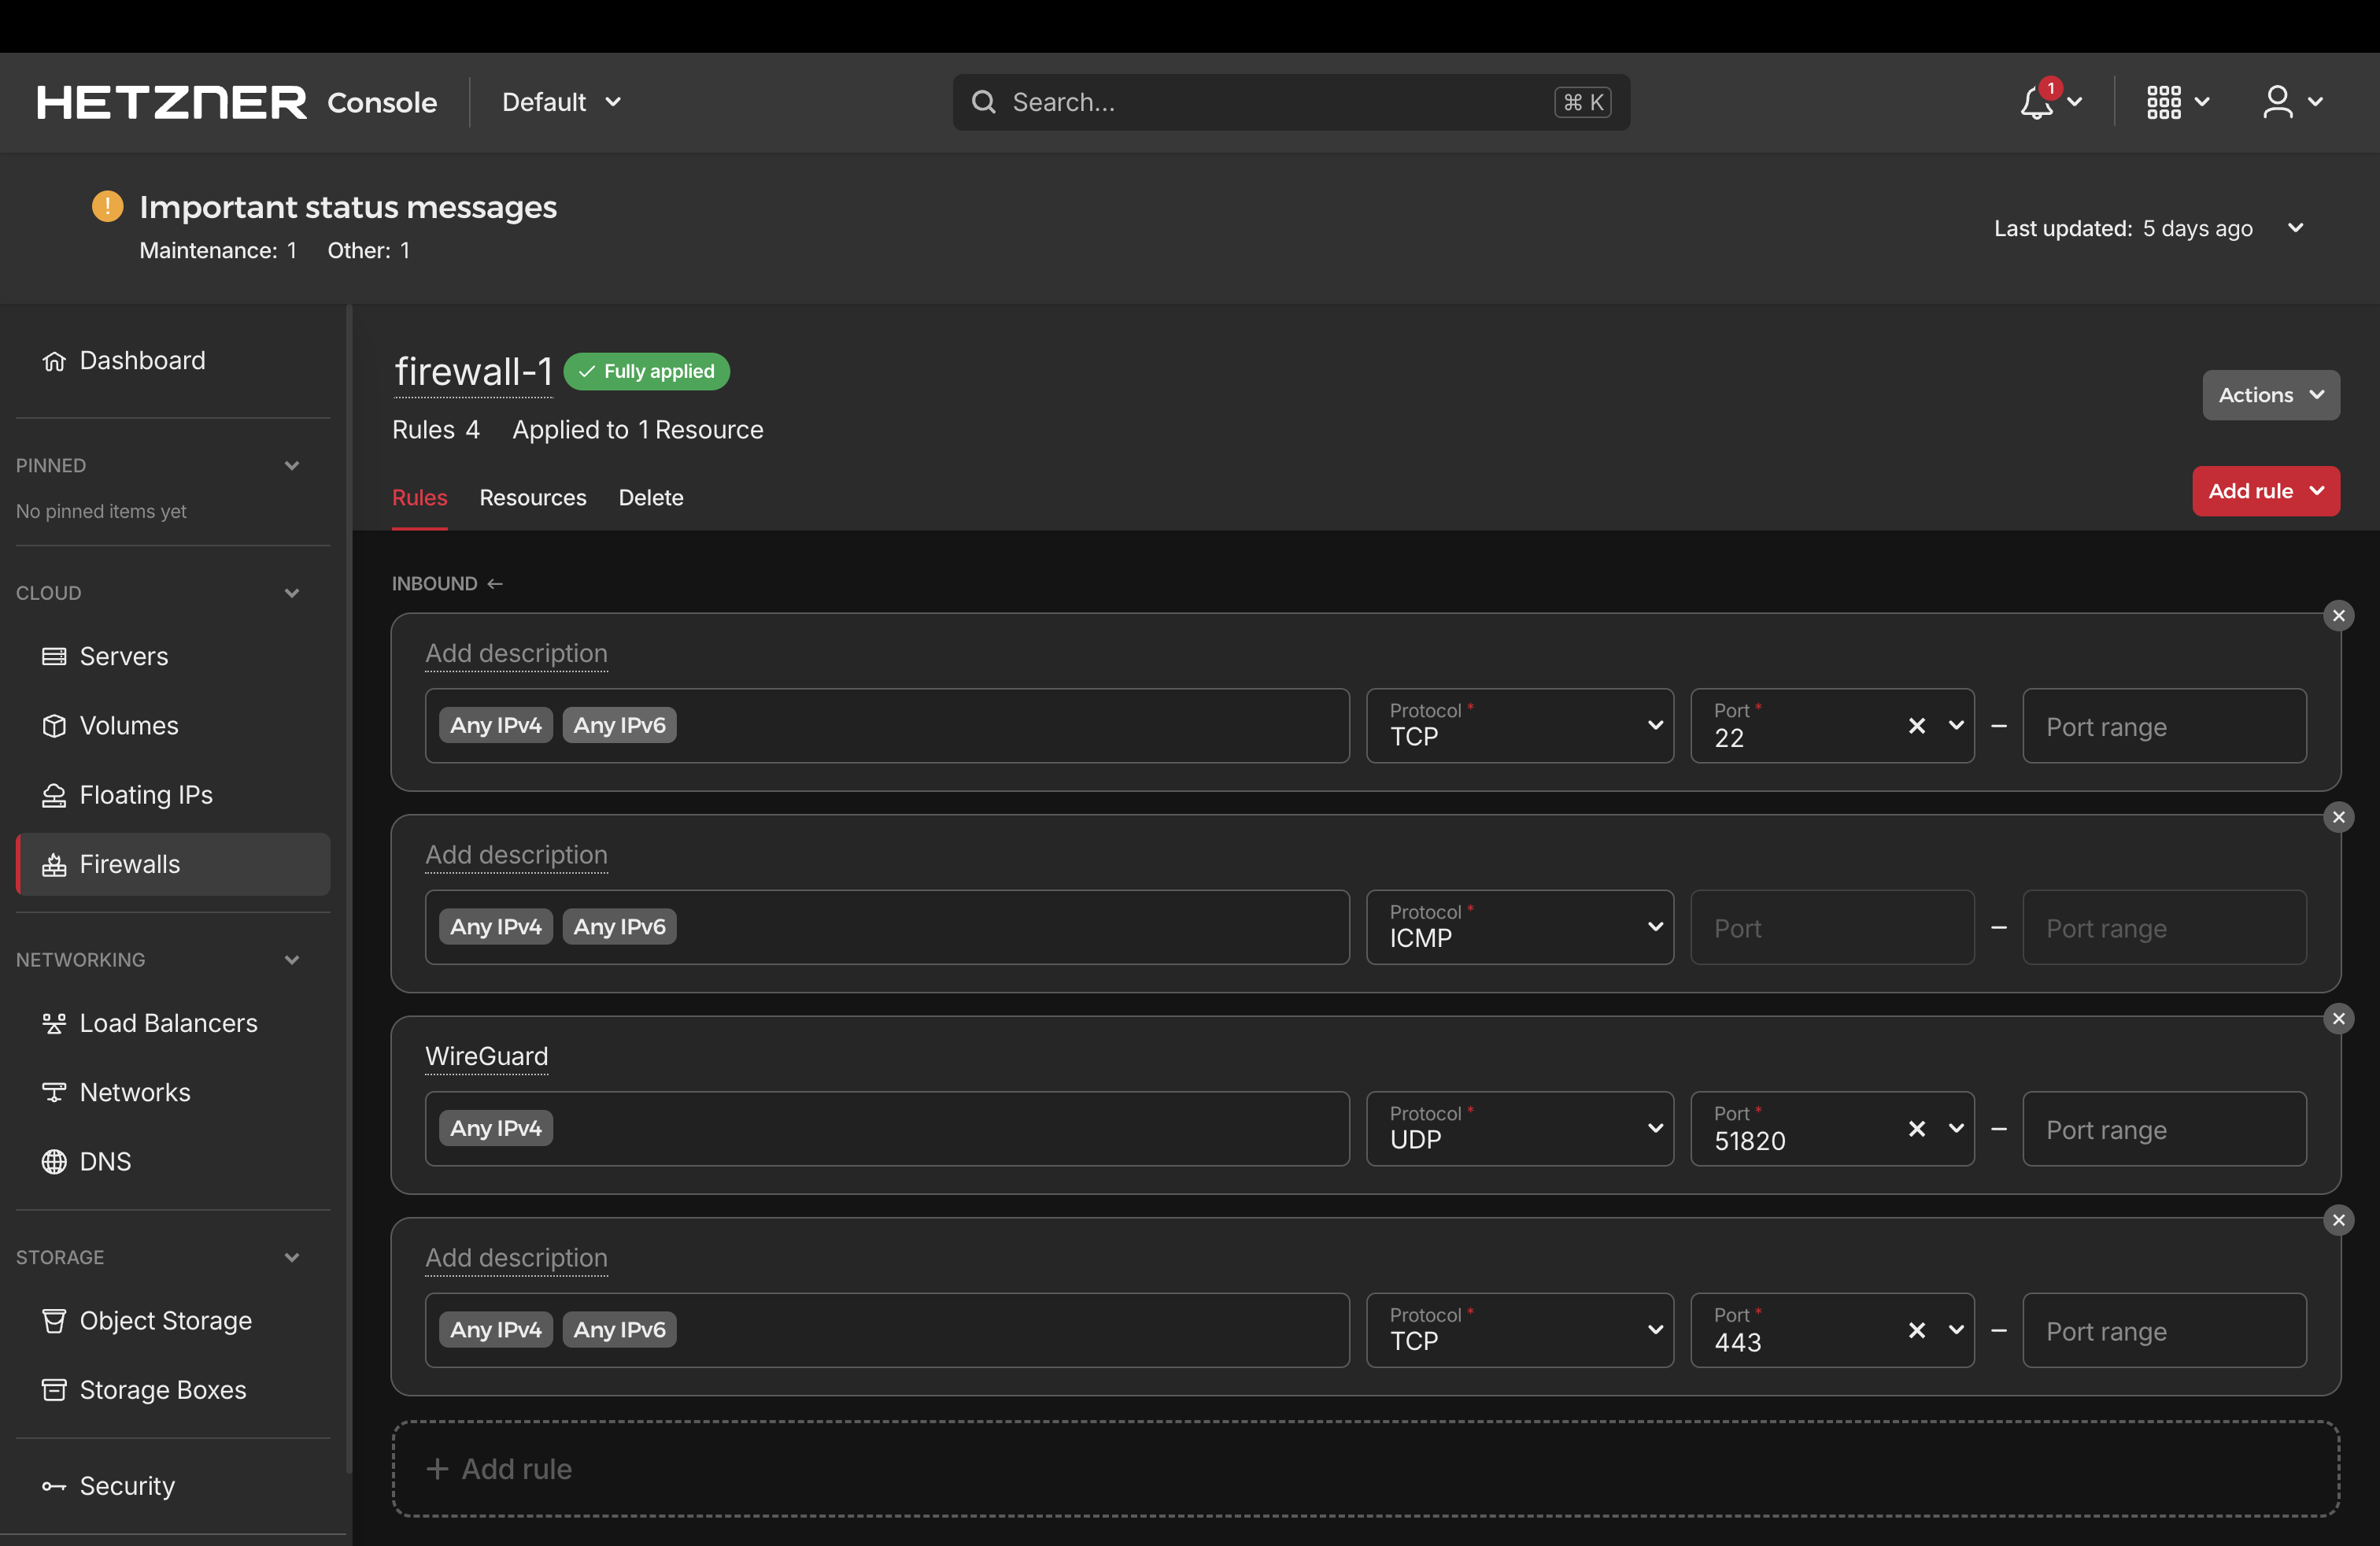
Notice: I have not removed the inbound SSH rule for TCP port 22 yet. You may not want to, but if you do, first make sure your WireGuard setup is working. We will validate that in the next steps so you do not lock yourself out of the server.
I also have port 443 exposed. This is for inbound applications I host over HTTPS. You may or may not need this.
WireGuard setup
- Install WireGuard on your VPS:
bash
sudo apt install wireguard
WireGuard quickstart
On the server:
- Create the configuration directory for WireGuard:
bash
sudo mkdir -p /etc/wireguard
sudo chmod 700 /etc/wireguard
- Generate the public and private keys for your server's WireGuard connection and write them to files:
bash
sudo sh -c 'umask 077; wg genkey | tee /etc/wireguard/server.key | wg pubkey > /etc/wireguard/server.pub'
- Confirm the directory and keys were created:
bash
sudo ls -la /etc/wireguard
sudo cat /etc/wireguard/server.pub
- Create an interface file for your server. Replace
<SERVER_PRIVATE_KEY>with the contents of/etc/wireguard/server.key:
bash
cat > /etc/wireguard/wg0.conf <<'EOF'
[Interface]
Address = 10.8.0.1/24
ListenPort = 51820
PrivateKey = <SERVER_PRIVATE_KEY (/etc/wireguard/server.key)>
EOF
- Start the WireGuard tunnel with the interface you just created:
bash
sudo wg-quick up wg0
sudo wg show
ip addr show wg0
- Make WireGuard start every time your server boots:
bash
sudo systemctl enable wg-quick@wg0
Add a client (your laptop) as a peer
Still on the server:
1) Generate a client keypair
Note: I named this file laptop because it connects from my laptop.
bash
umask 077
wg genkey | tee /etc/wireguard/laptop.key | wg pubkey > /etc/wireguard/laptop.pub
cat /etc/wireguard/laptop.pub
2) Add a peer to the server using the client's public key
bash
wg set wg0 peer "$(cat /etc/wireguard/laptop.pub)" allowed-ips 10.8.0.2/32
wg show
Client config (on your laptop)
- Download and install the WireGuard client for your OS: https://www.wireguard.com/install/
- Create
laptop.confsomewhere on your laptop and add this:
ini
[Interface]
PrivateKey = <LAPTOP_PRIVATE_KEY>
Address = 10.8.0.2/32
DNS = 1.1.1.1
SaveConfig = true

[Peer]
PublicKey = <SERVER_PUBLIC_KEY>
Endpoint = <YOUR_VPS_PUBLIC_IP>:51820
AllowedIPs = 10.8.0.0/24
PersistentKeepalive = 25
Make sure you replace the <...> variables with values generated on your VPS.
Notes:
PersistentKeepalive = 25is a common value when the client is behind NAT and you want it to stay reachable.AllowedIPs = 10.8.0.0/24means only VPN-subnet traffic goes into the tunnel, not all internet traffic.
- Open the WireGuard client and import the file.
- Click activate.
Test the connection
In your VPS terminal, run:
bash
sudo wg show
You should see output similar to this:
bash
root@ubuntu-2gb-hil-1:~# sudo wg show
interface: wg0
  public key: publicserverkey123412341234=
  private key: (hidden)
  listening port: 51820

peer: publicclientkey123412341234=
  endpoint: yourpublicipaddress:52509
  allowed ips: 10.8.0.2/32
  latest handshake: 13 seconds ago
  transfer: 83.71 KiB received, 51.86 KiB sent
Now you should be able to SSH from your client into your server:
bash
ssh root@10.8.0.1
Congratulations
If all is well, you now have a secure tunneled admin connection to your server. You can disable the public SSH firewall rule now if you want.